Posted on Jan. 28th, 2019 | By Candy, WayKen Marketing Manager
Today we are going to look at the manufacturing processes of the acrylic polymer or optical prototyping. It is one of the most widespread plastics all over the world and a prominent competitor to glass and polycarbonate. Due to the fact that acrylic parts are used in a lot of industry areas, it seems a good idea to look into its manufacturing processes, specifically CNC acrylic machining since that is the process that is present in almost any kind of acrylic production. This article will tell you how to choose the right blank, cut and engrave it using CNC routers and what to do after you are finished with cutting operations.

The Advantages of Acrylic and Why Machining is Best for It
Acrylic is such a widespread material because of its outstanding properties. First, and most important, it is 5 times stronger than glass. And by stronger, I mean shock-resistant and shatterproof. It is also very transparent. Acrylic has 92% transparency, meaning only 8% of the incoming light is lost when passing through it. To compare, window glass is 83-90% transparent, polycarbonate has 90% transparency. Sure, the difference is small but it is there. Apart from transparency and unlike other plastics, acrylic does not deteriorate after being under UV light for long periods of time. PC, for example, becomes yellow, other plastics become brittle. The same things can be said about corrosion and water resistance.
What do those properties tell us? That acrylic parts are very durable, resistant, and transparent. That makes them perfect for a lot of applications. Car lights, shop and advertisement banners and emblems, light tubes, and others. All of the mentioned applications require the utmost precision and great surface finish. And adding to the fact that Acrylic is quite strong and rigid, acrylic CNC machining is a perfect solution.
What Kind of Acrylic is Better for CNC Machining
Typically, acrylic blanks are manufactured using two methods: extrusion and casting. The first method is used to manufacture sheets, while the other is used to manufacture sheets and any other kind of form. Acrylic thickness from using both methods usually varies from 1,5 to 25 mm. Such a variety of thicknesses makes acrylic a good choice for cutting out flat emblems and signs. Let’s see which kind of blanks has better properties for CNC acrylic cutting.
Extrusion consists of melting large volumes of acrylic pellets in a special tank and extruding the resulting liquid through a specifically formed whole – an extrusion nozzle. Casting acrylic is similar to casting any other material. The pellets are melted and poured into a casting form, which is later cooled down and extracted. Extruded and Cast blanks behave differently under a cutting tool. Extruded acrylic has more leftover tensions so it is more susceptible to cracks and overall more brittle. That’s why machining it is a disaster. In addition, extruding makes its properties anisotropic, so you are basically machining different materials along the X and Y axes.
If you want to use acrylic CNC machining for your manufacturing process, pick only cast blanks. Extruded ones are not worth the effort.
Fixing Acrylic Parts For Machining Operations
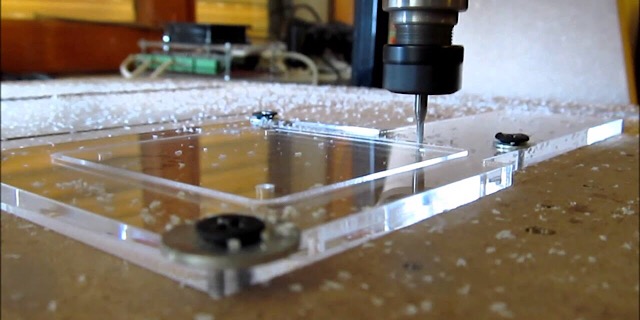
Now that we’ve decided on the blank type we’ll use, let’s discuss acrylic fixing specifics. I won’t discuss CNC router acrylic specifics because any type of metal or plastic CNC router will do the job just fine. I don’t recommend using wood routers though. as they have less rigidity. So, back to the fixtures. There is a number of ways to clamp acrylic but what you should really consider is blank size. Acrylic despite being quite rigid is still plastic and you’ll need to care that long parts or large sheets are clamped tight along the whole area. Smaller parts can be clamped using simple jigs and vises. Longer pieces are often glued or taped to the working table and if you plan on machining acrylic sheets often, purchasing a vacuum table is a must. It will clamp and unclamp your sheets perfectly.
The Specifics of Machining Acrylic

Feedrates
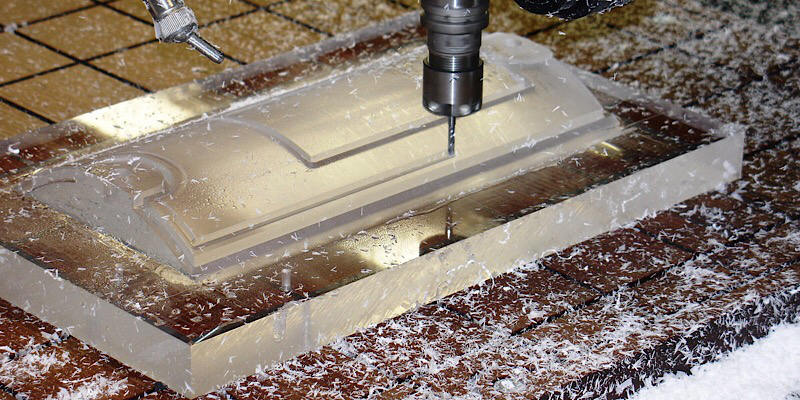
Once you’ve fixed acrylic into place, it’s time to cut to the chase, so to speak. The majority of acrylic blanks are milled. The actual machining of acrylic on a CNC router is in many ways similar to machining polycarbonate. First of all, use a similar RPM: 15,000-18,000 RPM. Then, use a stable and considerably aggressive feed rate. That is required to prevent the tool from staying in the same place too much and generating heat with the friction that comes from the cutting. If the feed rate is too small, the chips will start welding back onto the part and you will ruin the valuable surface finish and precision.
Cutting Tools
Special cutting tools are a must. You need to buy special acrylic cutting bits because they have flutes that ensure optimal chip removal and consequently, precision. In addition, when drilling acrylic, the drill tip angle must be much smaller than that of a standard drill. Instead of 120 degrees, it should be 60. That is also modified for better chip removal. Oh, and don’t worry if you haven’t achieved a perfect optical clear surface after machining, It’s impossible. In order to get a completely transparent part, you’ll have to employ some more efforts with finishing operations.
Coolants
In any kind of CNC acrylic cutting process, keeping the temperature to a minimum is a must. That is why a lot of acrylic sheets are cooled down before machining. It makes for better chip removal and a lower starting temperature. Apart from that, you can use some standard coolants, however, if they have oils, make sure those don’t react with PMMA.
CNC Acrylic Engraving
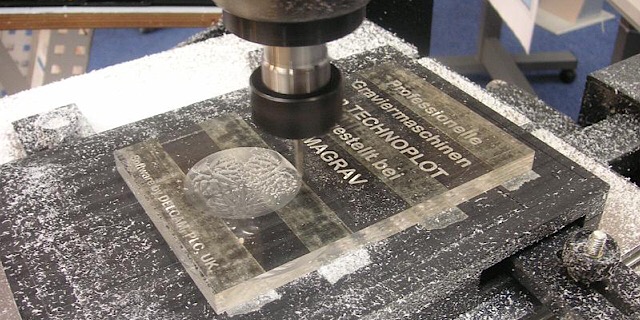
Engraving is a variation of the acrylic machining process. The engraving of acrylic is done in the same way as milling but with a different cutting tool. It is a very widespread method since a lot of acrylic parts serve for advertisement or aesthetic purposes. Modern CNC systems have enabled the engraving of the most complex designs on a plastic sheet. The resulting groove can then be filled with some paint in order to make the design more visible.
Postprocessing Machined Acrylic
Having achieved the desired precision and form of the acrylic parts, it is always necessary to grind and polish the parts. That is usually done by consecutively applying polishing tools with a smaller grit and a linen towel with polishing paste at last. Apart from that, there are some chemical polishing methods that involve pouring special gas to melt the outer layer of acrylic. And the last but not least are exotic diamond tool single tip milling processes, when a tiny amount of plastic is cut from the surface by a very sharp and durable single-tip mill.
Our Advantages in CNC Machining Acrylic
WayKen as a professional prototype manufacturer takes pride in creating clear acrylic optical components in the plastic machining industry with 3-axis, 4-axis, or even 5-axis CNC machines. To advance the development of ultra-precision manufacturing, we have adopted the latest diamond machining technology. This technique called SPDM or SPDT that can match the ability of 5-axis micro-milling to produce a range of lens and light guides types of excellent optical quality in an array or freeform pattern.
In the future, We will continue to improve our CNC prototyping services and upgrade machining equipment and cutting tools in order to maintain the highest quality machined clear plastic parts in the industry. To do this, we aim to provide the best service for customers that need machining all kinds of optical components in any complicated shapes as required.