Posted on July 12th, 2019 | By Candy, WayKen Marketing Manager
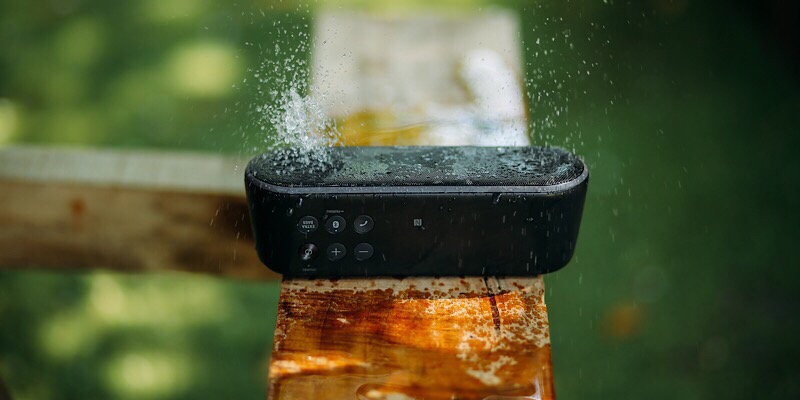
Clients demand more and more from the devices the manufacturers produce. Just 5-10 years ago who would have thought about phones, watches, cameras or lights that work underwater. Nowadays, when we see a non-waterproof watch, we frown upon it. A lot of tablet and cellphone models can be submerged or will at least withstand a fall into a puddle. Some devices can’t do with it whatsoever, for instance, blenders, electric pots, and other home appliances. However, making a waterproof device is easier said than done.
The main point is to make an enclosure that prevents water from short-circuiting your electronics. You need to ensure special features are installed to prevent water from flowing in. And even then, you must make a waterproof plastic prototype of your enclosure to conduct tests and ensure that it doesn’t leak. So, here are a few design tips to create custom plastic enclosures and some about metal enclosures that protect against water. And most importantly, some rapid prototyping tips as well.
Waterproof Enclosure Standards
The first thing you need to know is that there are multiple degrees of enclosures being waterproof. They are all rated by the IP and NEMA standards. The IP by the International Protection Marking is the most widespread one so here is a list of IP-rated watertight degrees.
- IP65. This standard states that the enclosure must withstand a water jet. This is tested by placing an enclosure and pouring water from every angle in a jet. The parameters are the following: distance -3 m; nozzle diameter – 6.3 mm; water pressure 30 kPa, water volume – 12.5 liters per minute.
- IP66. An enclosure according to this standard must withstand high-pressure jets. Up to 100 kPA and 100 liters per minute flowing from a 12.5 diameter water nozzle for 3 minutes.
- IP67. This standard dictates a completely waterproof design. The part is submerged under 1 m of water for half an hour for tests.
As you can see, the IP standards are different. And that’s a big advantage since you can correctly estimate the conditions your device is supposed to work in and decide where to stop inserting features to deflect water. I mean, making a completely waterproof design is much more expensive than making an enclosure that can withstand a water jet or some drops.
5 Ways to Make Waterproof Connections for Enclosures
Now that we know the standards to watertight plastic enclosures, let’s see what we can do to make them that way. Here is a list of the most commonly used measures to manufacture custom plastic enclosures with IP66-67 standards in mind.
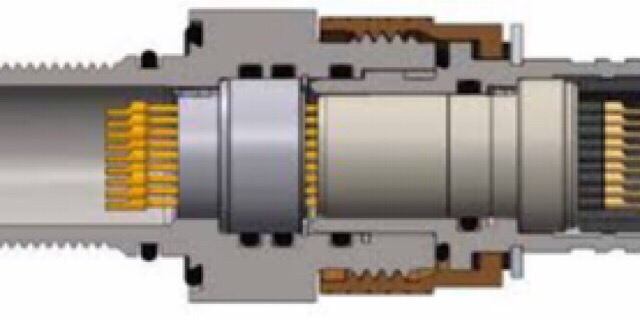
1.Seals and gaskets. The most common, useful, and cheapest method to manufacture waterproof plastic enclosures and waterproof aluminum enclosures (or made of any other metal, for that matter) is to use rubber seals. They are cheap, they don’t take up much space and they are extremely efficient. The main mechanism here is rubber being elastic and covering the two connecting parts and preventing any liquid from entering between the parts and the seal. Among seals, the most widespread are o-seals. They are rubber rings with a round cross-section. O-rings have an outstanding suppression rates so they protect against liquids the best. They can even be used to make dynamic seals. That is when one part moves (a piston, for example) and the other part is set. You just have to make 2-3 grooves with o-seals in the static part and you are all set.
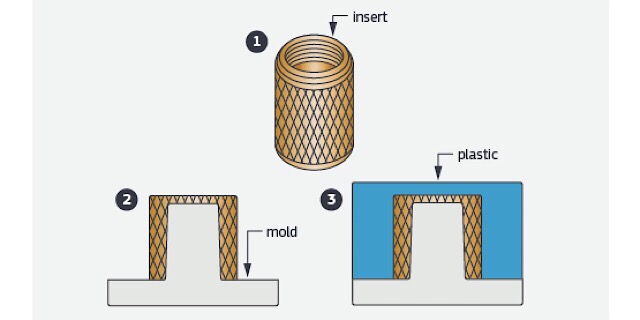
2.Insert molding. This one is useful for aluminum or metal enclosures. You basically mold an elastic element that will serve as a seal onto a metal part. The seal will be smaller that way and you won’t lose it since it’s fixed.
3.Overmolding is basically the same as insert mounding but the base component is made of plastic as well. This method is mostly viable for mass production since it uses a costly plastic injection molding technique. However, modern manufacturing technology allows the designers to test their project enclosures by making an order from some prototyping services that can offer rapid injection molding
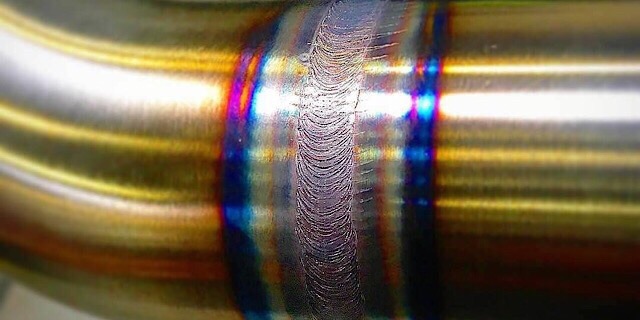
4.Welding is most common in metal enclosures for electronics. The metal around the rims of the joined parts is melted so the part becomes completely hermetic and a single component actually. However, completely sealing off the circuits is not always a good idea because it’s going to be really hard to repair the device in case it malfunctions, and additionally, there will inevitably be some air trapped inside and when the device heats up, the pressure inside will mount and the enclosure may burst at some point.
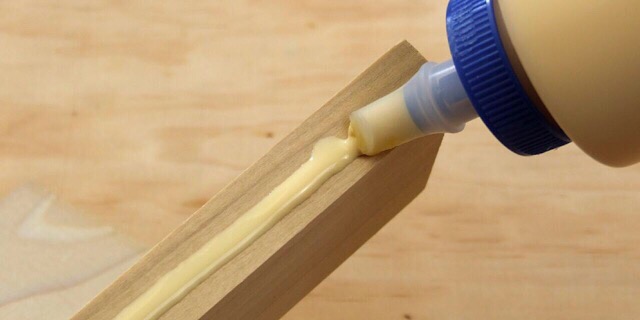
5.Foam tape and adhesives are quite useful and easy to use. They don’t require any design modifications and protect against water very well. However, their main issue is that they can only be used until the first disassembling. Once you separate the parts, adhesives become useless and even hinder the latter assembly because you’ll need to scrape off the leftovers. They are often used in rapid prototype design verification tests where welding is used in the final product.
Waterproof Enclosure Rapid Prototyping
So, you’ve chosen where to put some O-rings, where to weld and where to glue parts together. Now, before mass production, you must check the IP standard of your design with actual physical tests. And for that, you must manufacture a rapid prototype waterproof enclosure. There are a lot of techniques to do that depending on the prototype materials.
For example, small plastic enclosures and medium-sized ones can be set for 3D printing. Metal enclosure designs are due for CNC machining in machine shops. And lastly, over-molded designs or prototype batches can be manufactured with rapid injection molding, a process similar to conventional molding but with improved flexible mold design and a much lower prototyping cost.
Having manufactured the prototypes, it is important to assemble them carefully so as to ensure that the test results will be as good as possible. If the tests are unsatisfactory, you will have to review the design and remanufacture. Rapid prototyping will be useful here as well since it is very flexible and you will receive a modified prototype as soon as it is possible.